It's the time of year when university students start the arduous process of applying for graduate jobs. I thought I would reveal an interesting insight into the number of jobs I applied for. A quick search of my mail inbox returns the result, '1 of many' which feels about right.
An aspect of applying for work that is ever-present is the request for a portfolio or work that you would like the interviewer to see. Personally, I believe that my portfolio (showing my diverse work) really helped me to receive interview offers as it demonstrated my skills and abilities.
However, once you've got your website made to showcase your work, how do you host it?
You may be familiar with a range of large hosting companies that reel you in with low prices but then quickly increase costs and make it difficult for you to leave. This post will talk you through two different ways you can host your portfolio for free!
1. Netlify
This first method of hosting your website is my favourite as Netlify is extremely easy to use and always updating it's offering.
Step 1: You'll need an account.
You can register for an account with the following:
- An email address
- An existing GitHub account
- An existing GitLab account
- An existing BitBucket account
Step 2: Uploading your website
Once signed up and logged in, you should be presented with a dashboard, titled 'Team Overview'.
The page I am presented with says, 'Joe Lamyman's team', 'Team overview', so if you see something similar to that - you're in the right place!
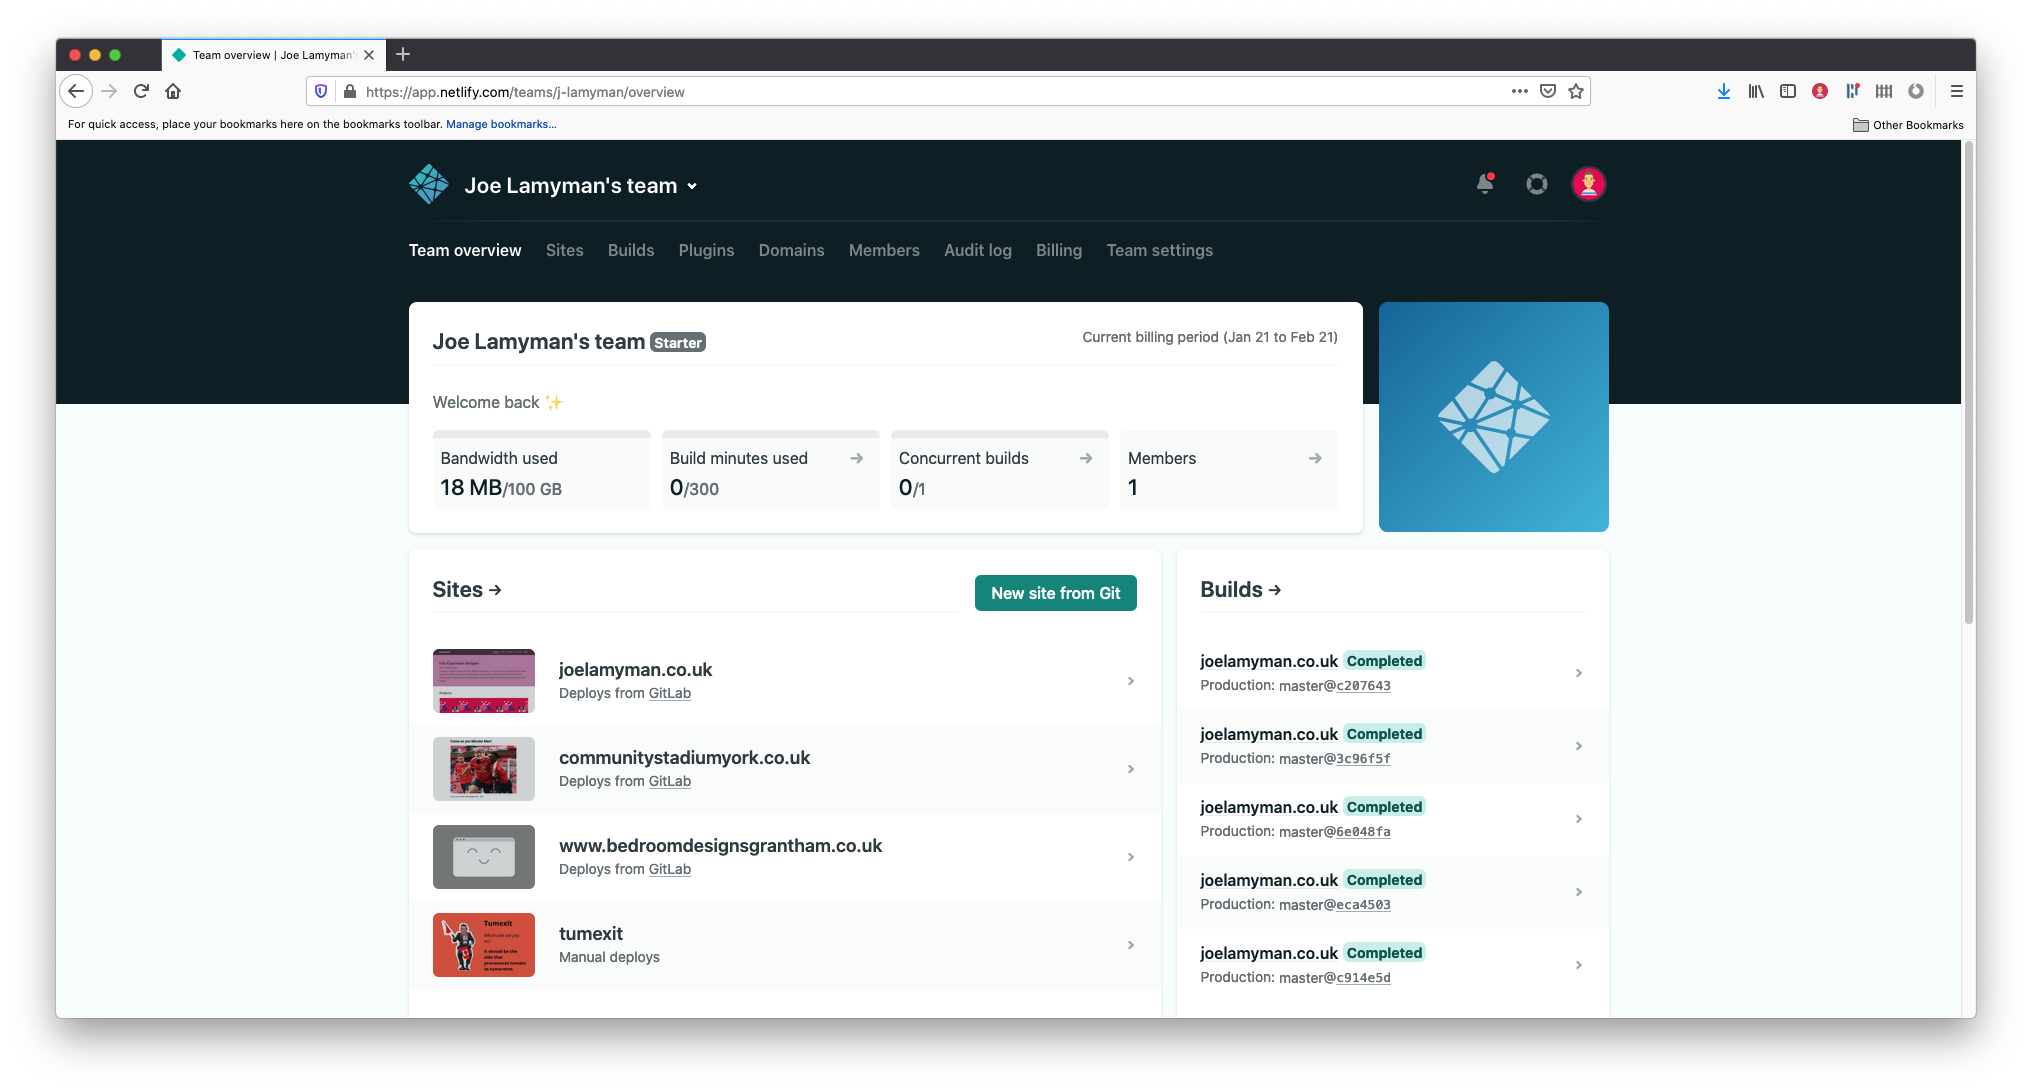
Next, you will need to navigate to the 'Sites' page.
Here, you should see the option to drag and drop your site folder. You may find this section towards the bottom of the page.
I understand that this method is not accessible to all users, so I have contacted Netlify to understand if there could be a button or alternative method to upload a file without the need to drag and drop.
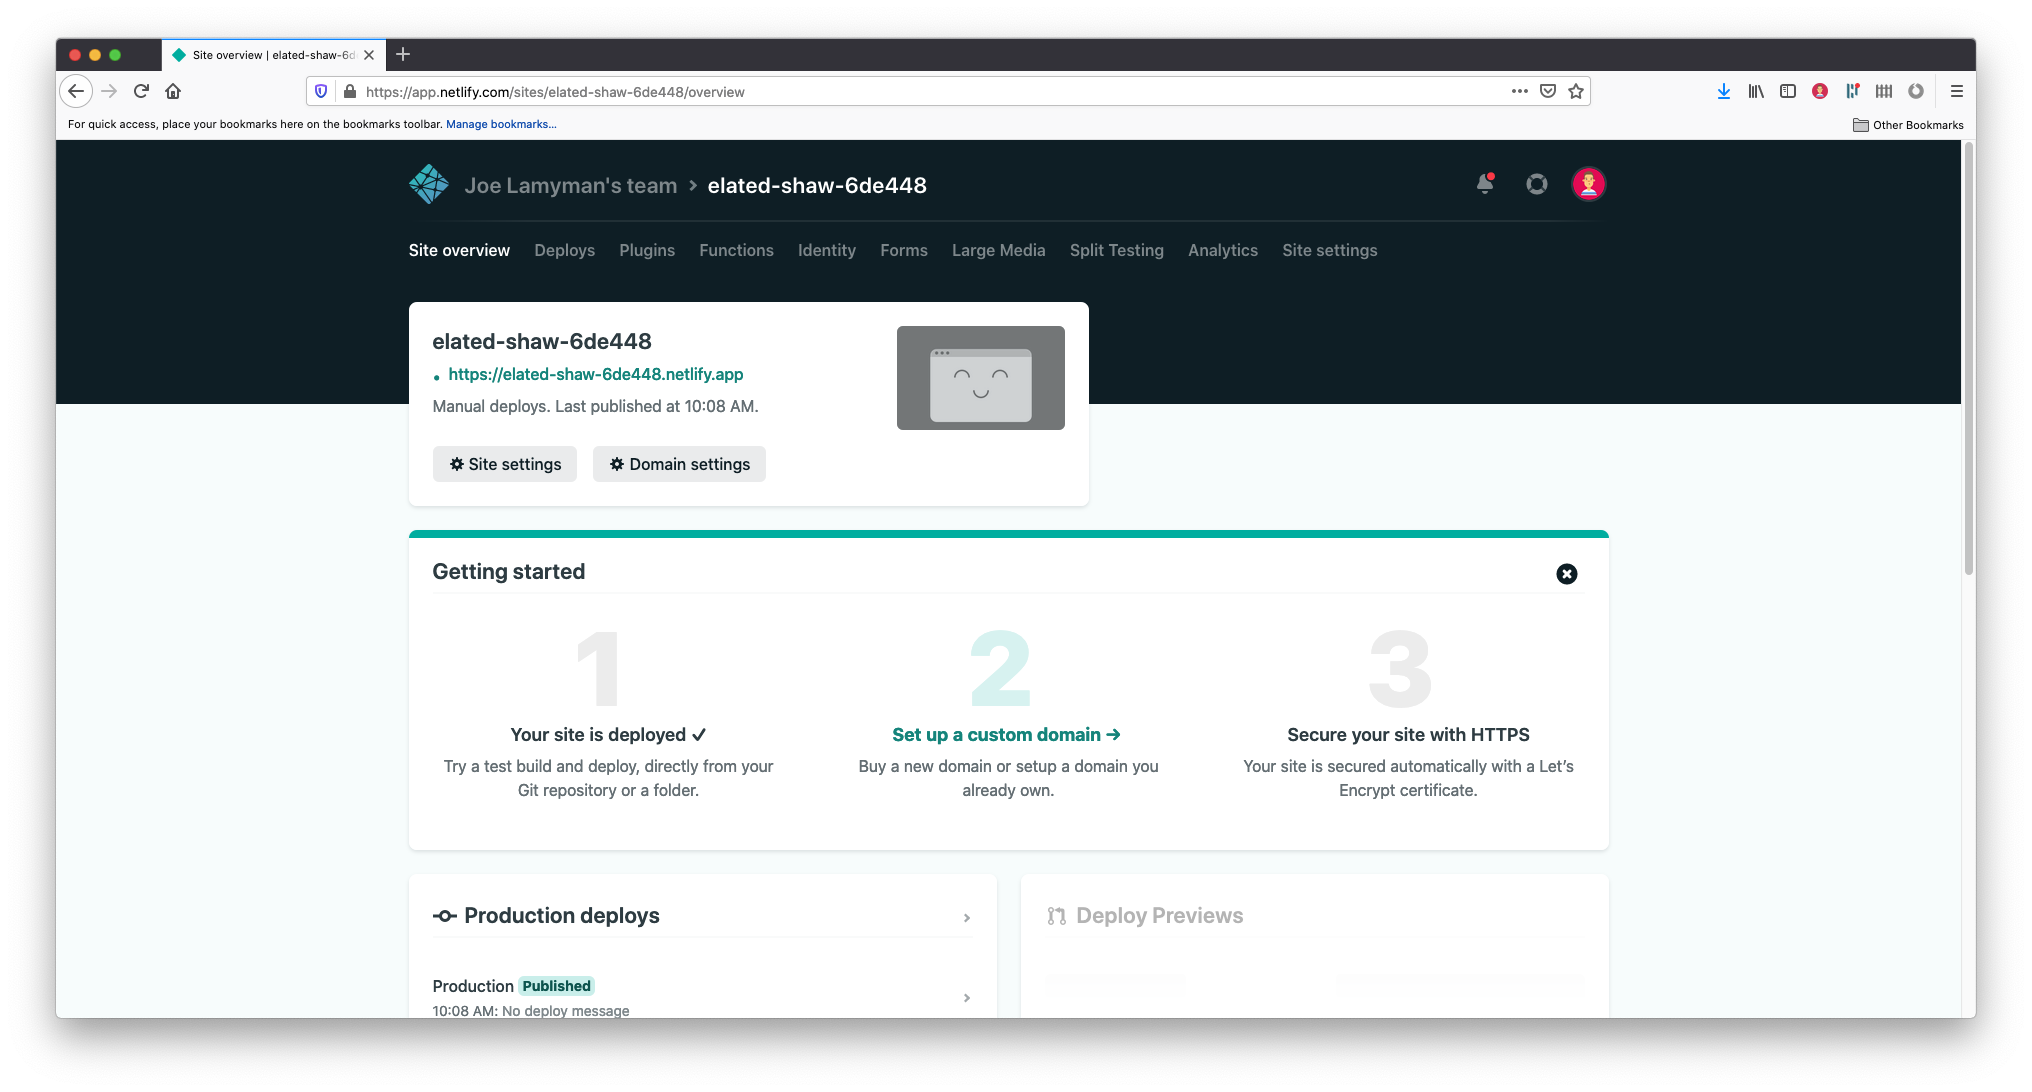
If you drag the folder containing your website to this section, your website will begin to upload. You should be given a random name and website address. On the screen, a message to tell you that your site is being deployed should be presented.
Everything is working great!
After a short time, your site will be deployed. You will know this has been successful as the message on screen will change to: Your site is deployed.
Step 3: Set up a custom domain
If you have already purchased a domain (I use Google Domains for all my domain names and have found it to be the most straight-forward to use, i.e. I'm not harassed by daily spam), you can now use this. If you don't have a domain, that's also fine! I'll explain how you can still get a customised domain.
Step 3.1: If you do not have a domain
From the 'Site overview' page for your website, navigate to the 'Site settings' page.
On this page you will find 'Site details' and information about your site. There should be the name of your site which will have been randomly generated.
If you select the button on this page titled, 'Change site name', a dialog will be presented. Here you can change the existing site name to something more appropriate.
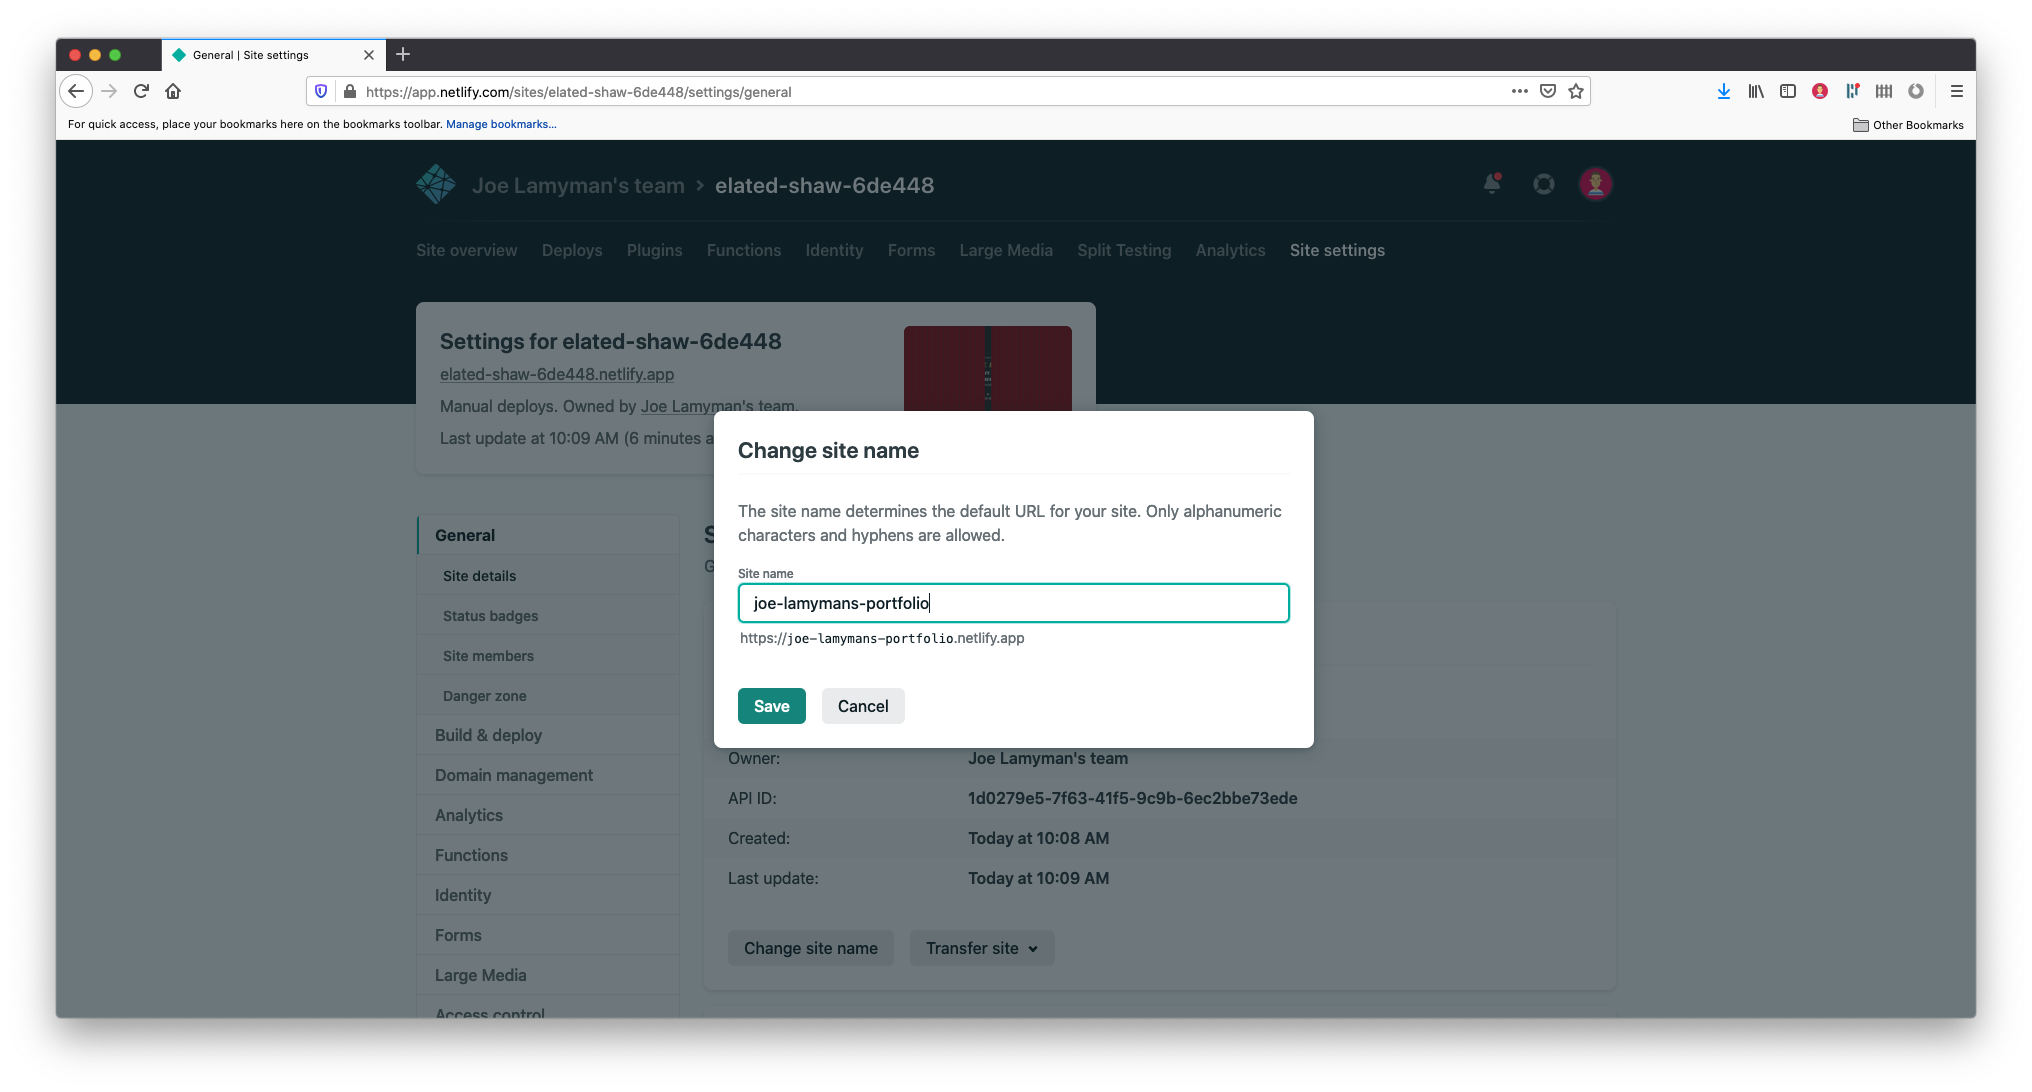
Make sure to save the change!
I changed my site's name to: joe-lamymans-portfolio. As such, the address for my site now will be: joe-lamymans-portfolio.netlify.app
Without paying for a domain, you will always have the netlify.app extension on your address, but I do not think that is a problem! The benefit of this, is that your site will be using HTTPS without you needing to do anything else.
You can find the link to your site towards the top of the page. The UI will say something along the lines of: 'Settings for' and then the name you just provided. The link can be found directly after this.
There's nothing more you need to do, skip to step 4!
Step 3.2: If you have a domain
If you have a domain, from the 'Site overview' page, navigate to the 'Domain settings' page.
On the domains page, select the button titled 'Add custom domain'. You will then be asked to enter the custom domain that you'd like to use. For example, if you purchased the domain www.joe-lamymans-portfolio.co.uk, in this field you would enter www.joe-lamymans-portfolio.co.uk.
You will then need to verify this domain. For the best results, you will want to use the Netlify DNS.
To do this, when you select your domain name on the Domains page, you should be presented with four name servers, these will look like: dns1.p01.nsone.net
Head over to wherever your domain is registered and within your DNS settings, there should be an option to use custom name servers. Select this and then add the name servers presented to you by Netlify on the domains screen.
It may take a little while for the changes to be made, I've had to leave it overnight before, so do not worry if the changes are not instant.
Step 3.2.1: Set up HTTPS
Finally, you will want to use HTTPS to ensure that it can be accessed and used securely.
Still on the domains page within Netlify, towards the bottom of the page should be a 'HTTPS' section.
To use HTTPS on your site, with Netlify it is as straight forward as selecting a button. This will then request a HTTPS for your website. Once requested it may take a little bit of time for the certificate to be requested and used. However, once you've done this, the process is managed automatically.
Step 4: You are good to go!
That is it. Process over, you have now got your website hosted for free with Netlify!
Now when you go for an interview, you can casually slip in a phrase like:
"Nice to meet you. Did you know I'm FULLY utilising the frictionless array of serverless utilities and REALLY expanding on the Jamstack methodology by hosting my site on Netlify!! Q4 is going to be MASSIVE for me and I can't wait to rehydrate my DOM with those Netlify serverless functions... WHO AM I KIDDING, we all know they're really just AWS Lambda functions LOL"
If that doesn't get you a job, you didn't want to work at that company anyways.
2. GitLab Pages
This is the other method for hosting free websites that I tend to use for quickly getting a site up and running. It is also really convenient if you're already using Git to host your code. In this example, I'll be using GitLab as GitHub refuses to drop ICE and GitHub recently fired an employee who warned of Capitol attack Nazi link.
Step 1: You'll need an account
You can register for a GitLab account with just an email address and you might find this the quickest way to get going.
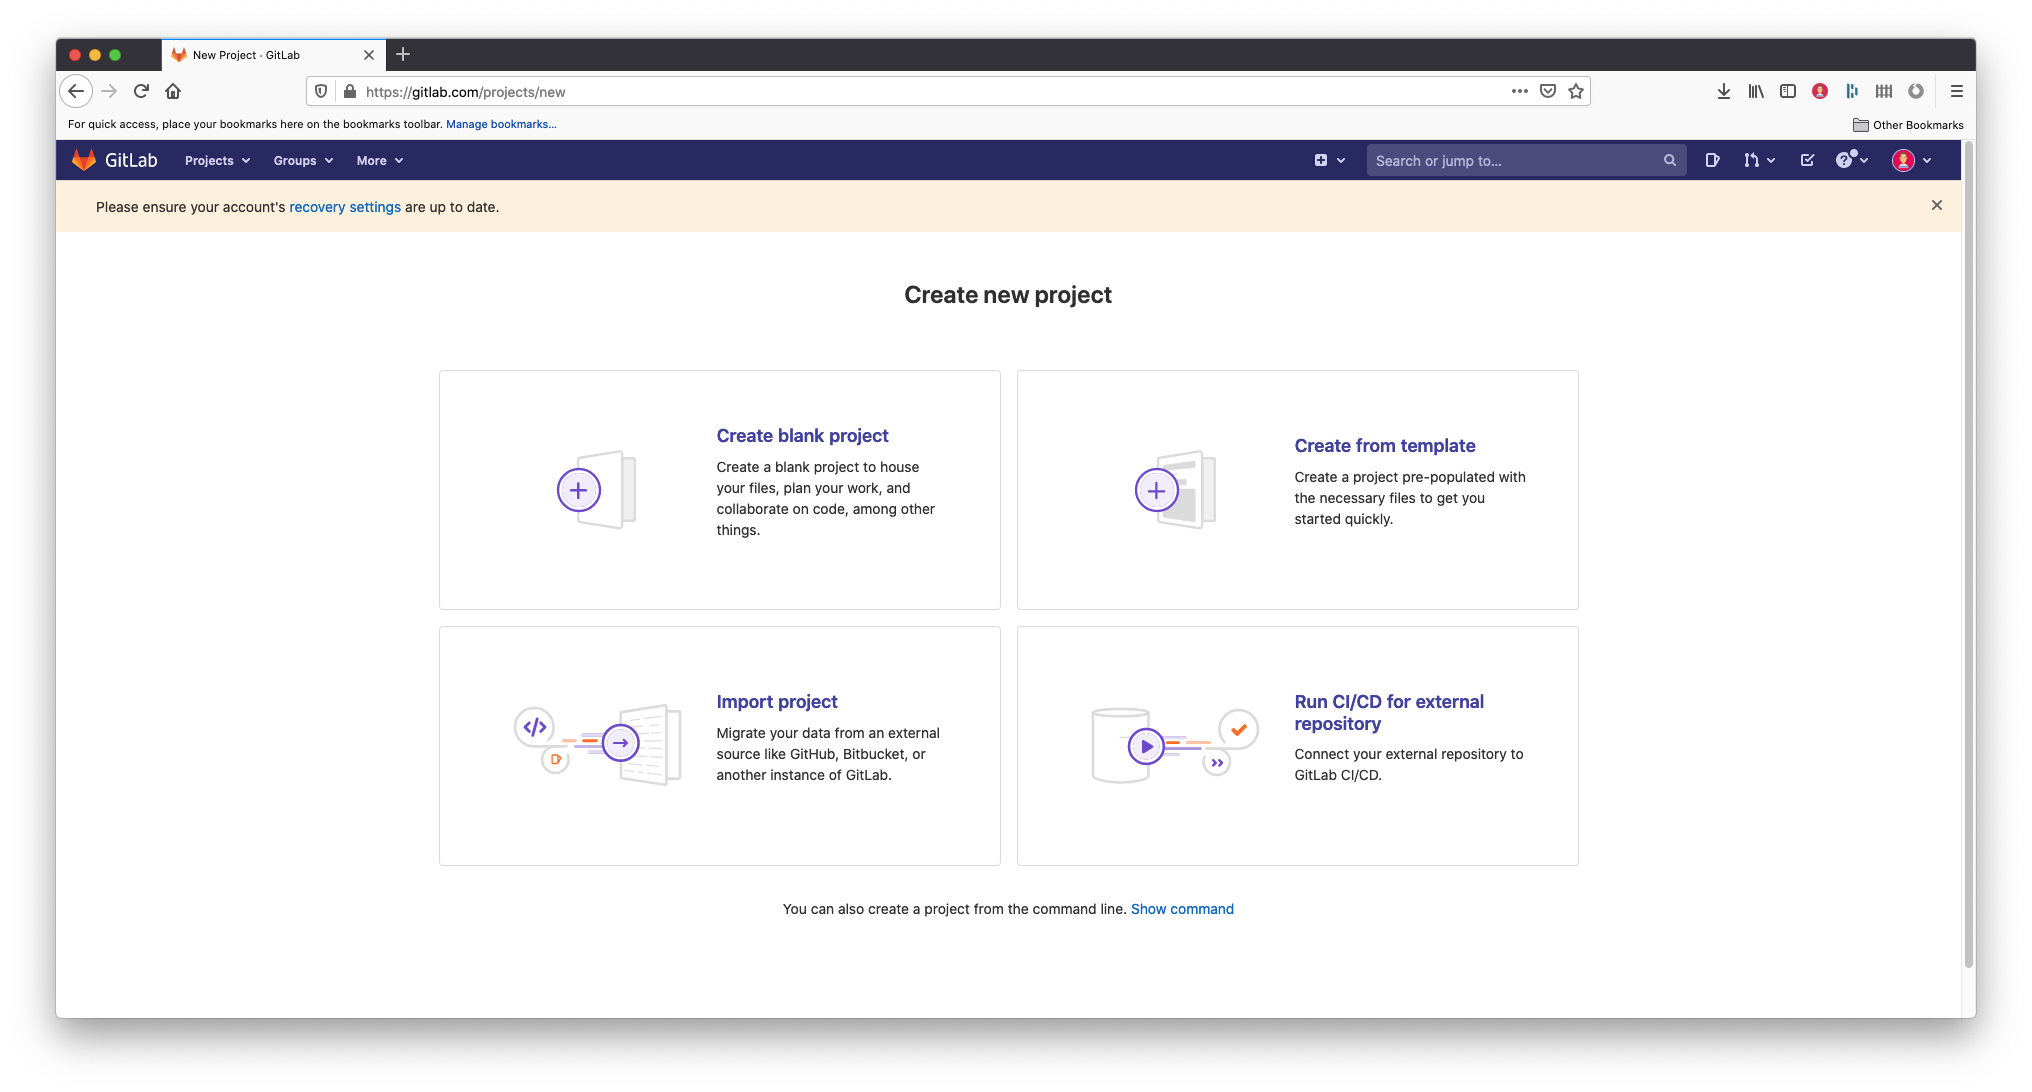
Step 2: Make a new project
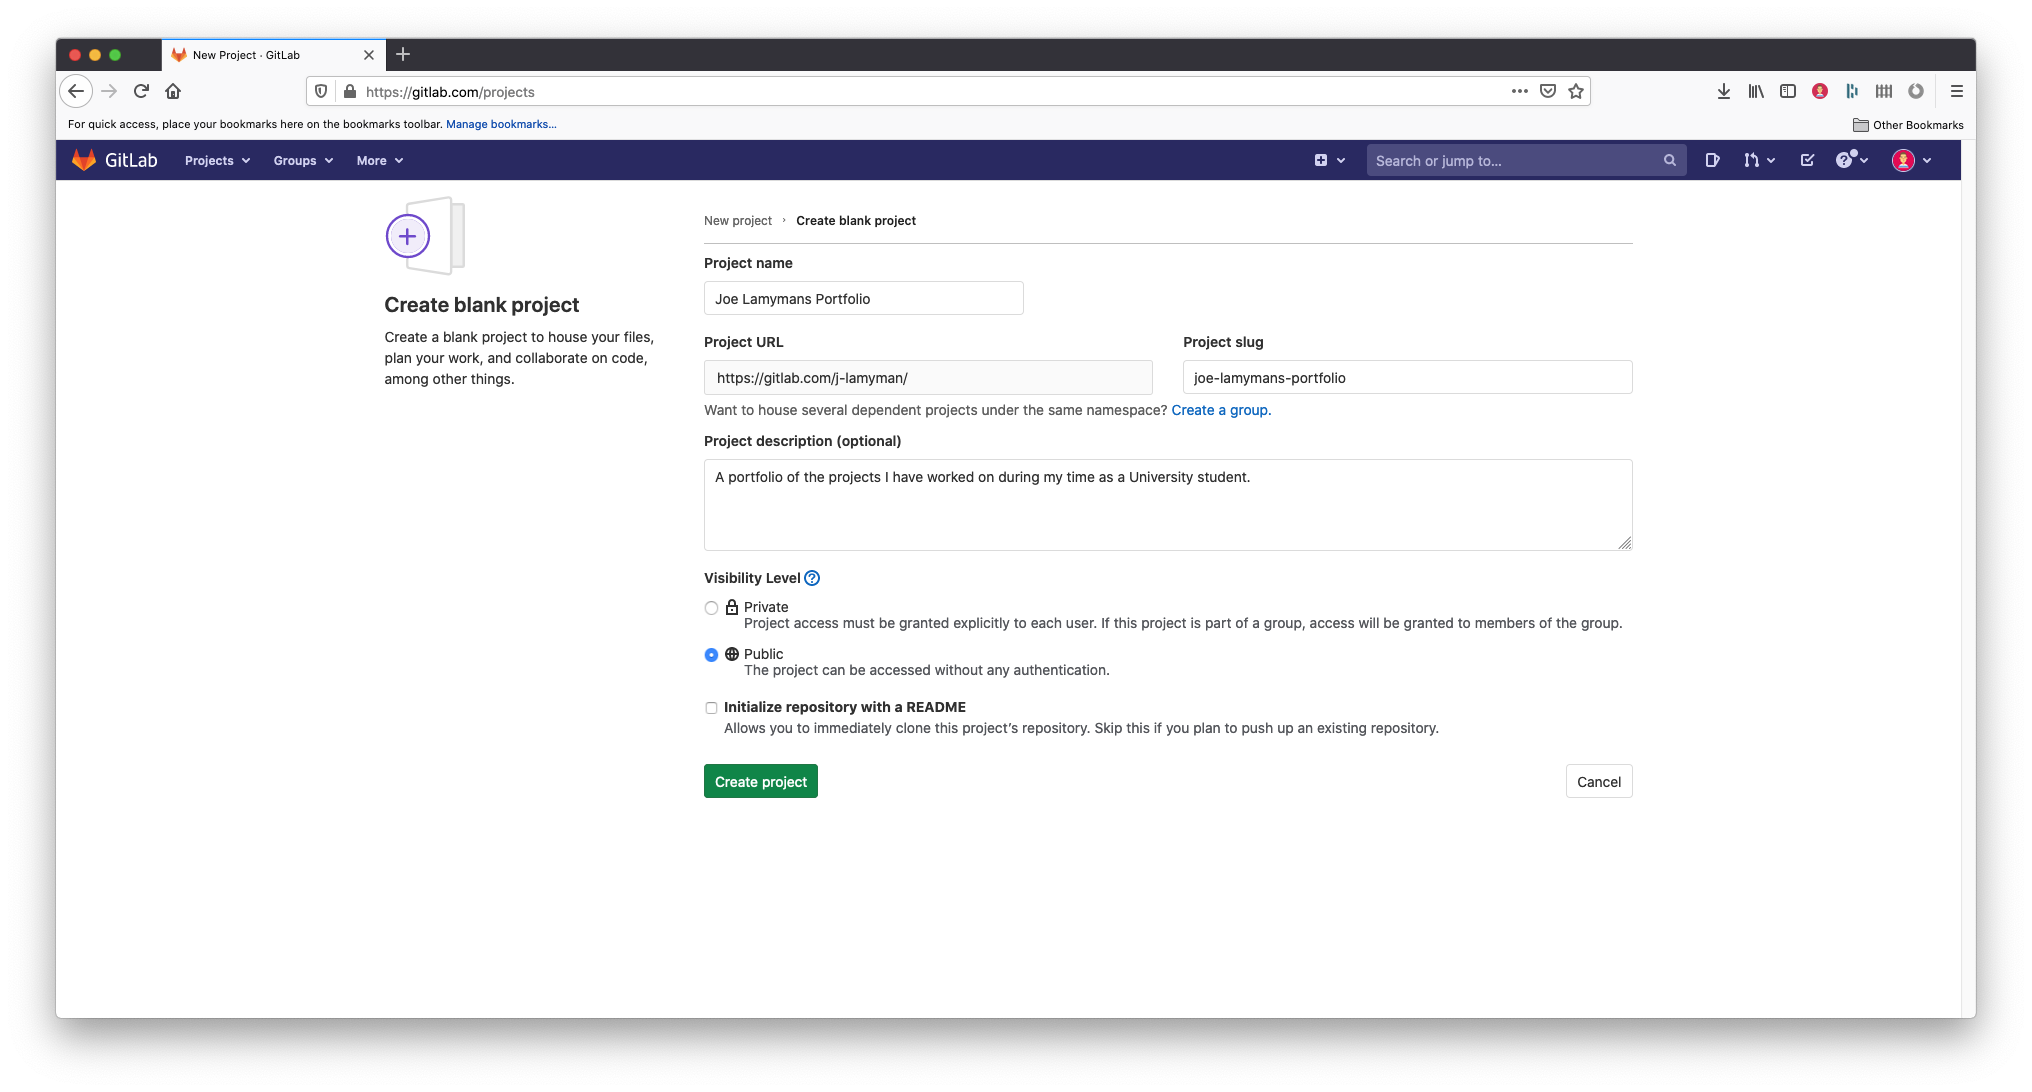
Once you've signed up and logged in. From the 'Projects' page, you need to select the button titled, 'New project'.
You'll need to enter a few details and be sure to set the visibility to public!
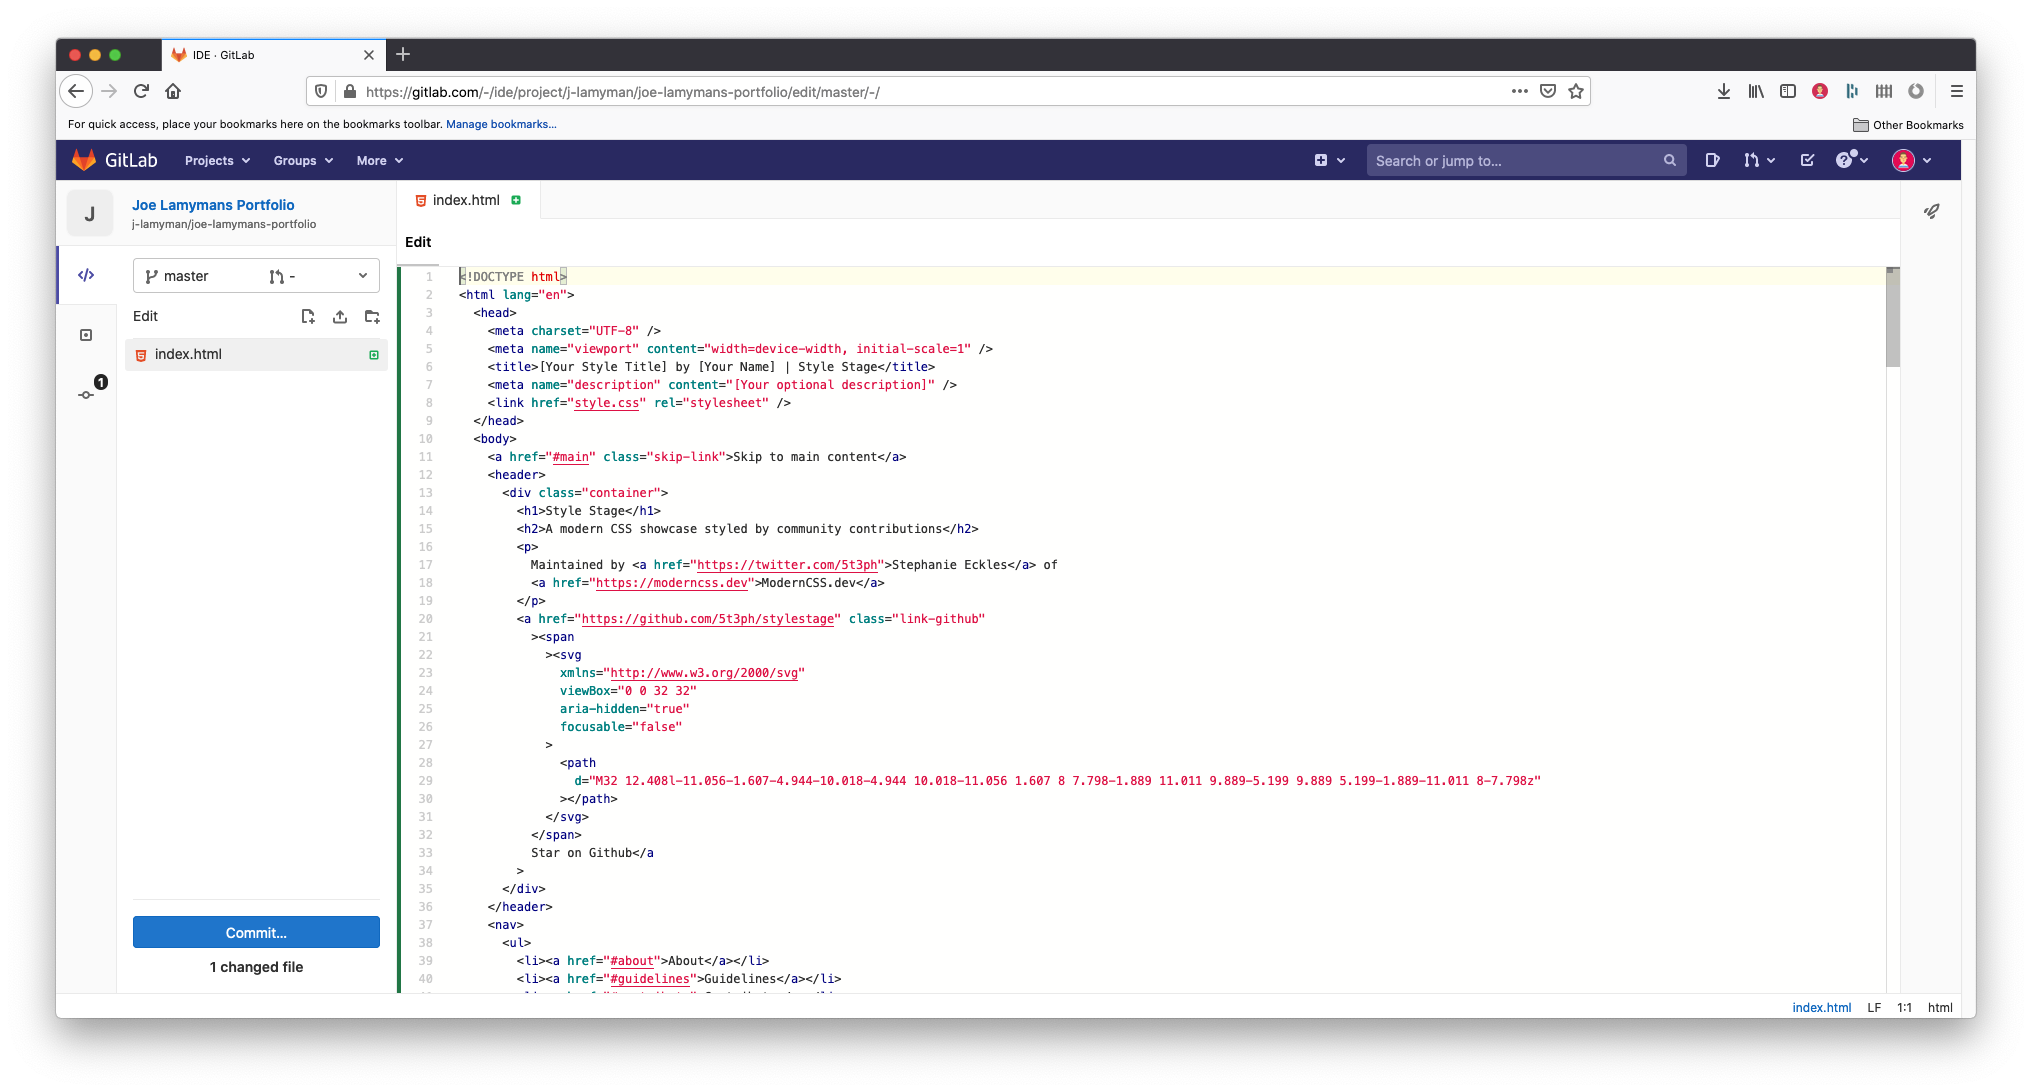
If you are confident enough with the command line, you can follow the instructions to push an existing folder. If not, you can select the button titled, 'New file'. This will take you to an online text editor where you can create your files and copy over all of your code into them.
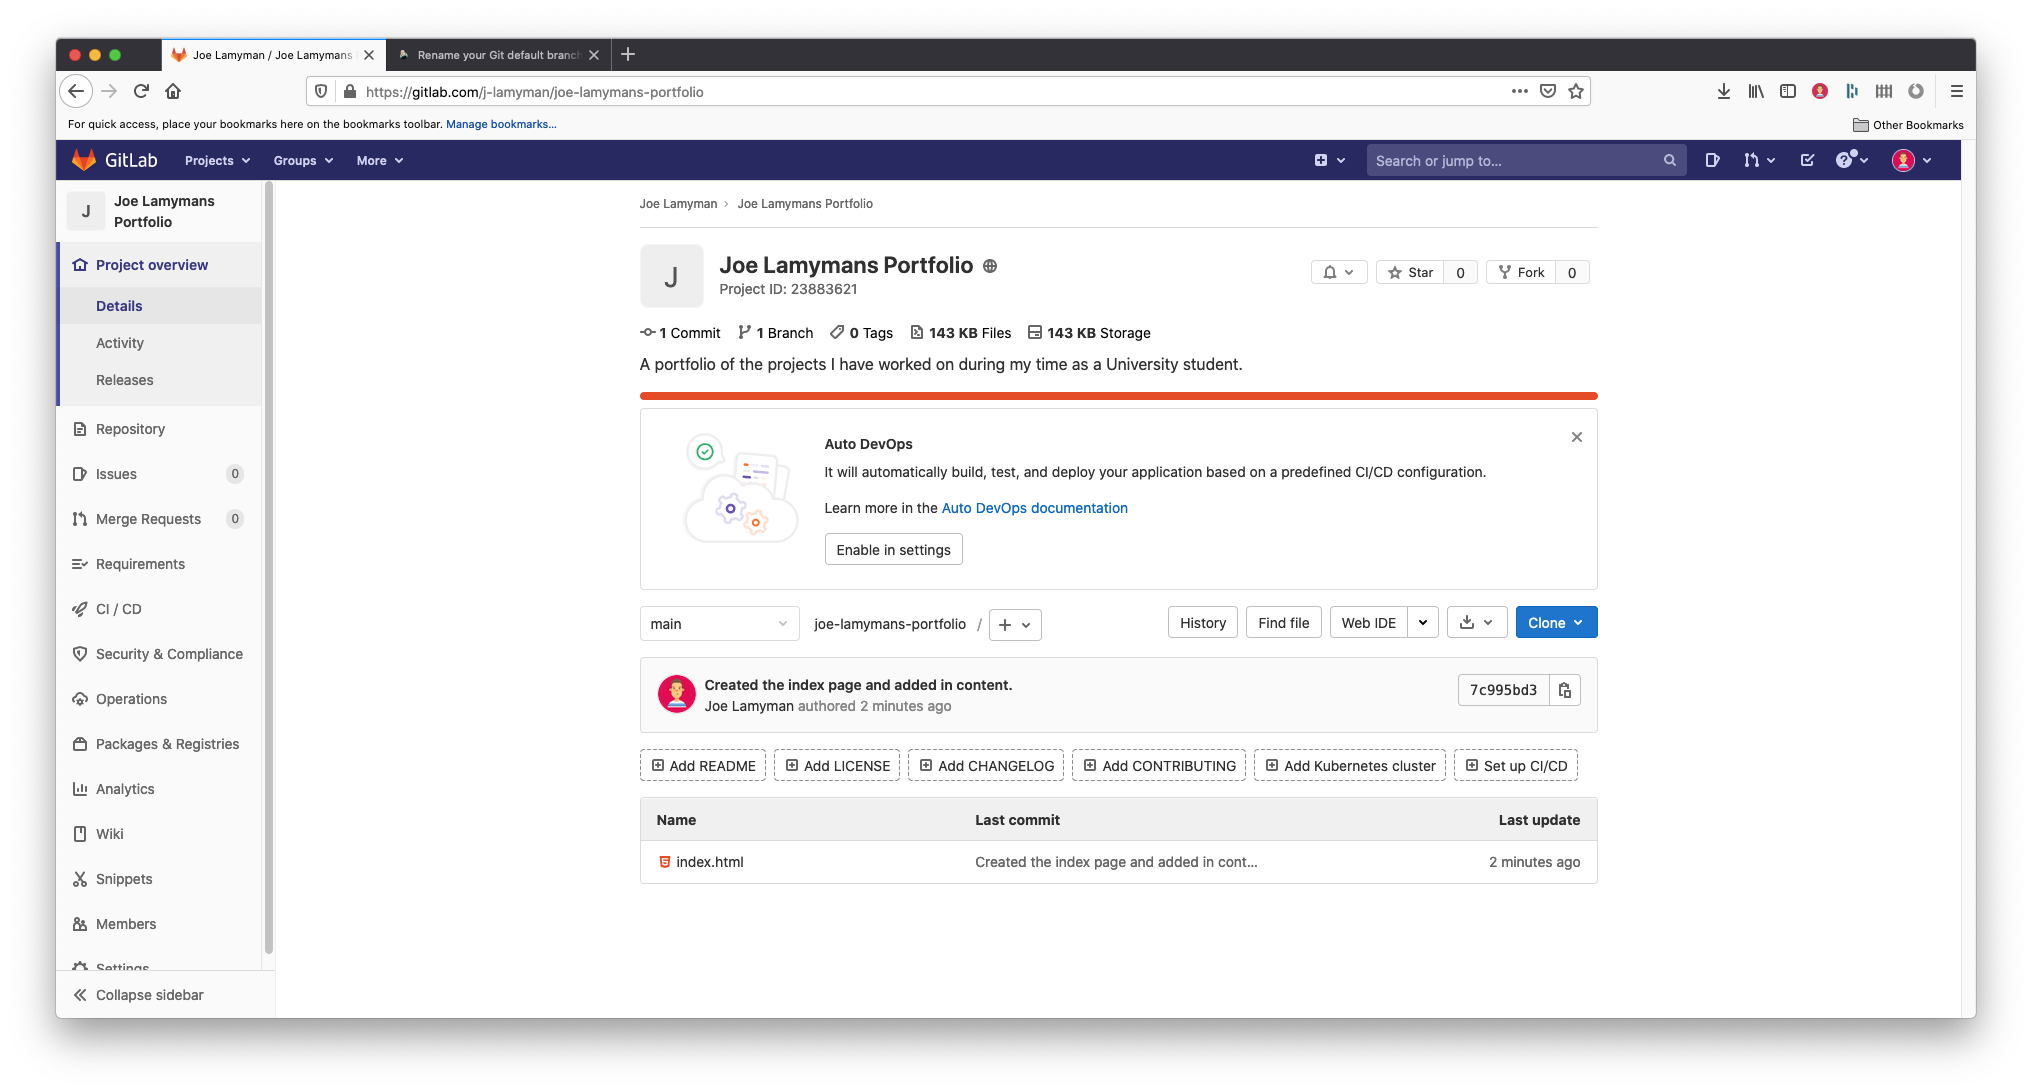
Once you've added your files, you need to select the 'Commit' button to save your work. You will be asked for a commit message, just describe the files you added. Something as simple as: "This was a YOLO commit, added my whole site", will suffice for now. You can go ahead and commit this now.
If you head back to your projects page, your commit message should be on screen, as well as the files that you created.
Step 3: Setting up Pages
On your project's 'Project overview' screen, select the button titled, 'Set up CI/CD'.
This will take you to an intimidating looking screen, but we do not need to do too much here.
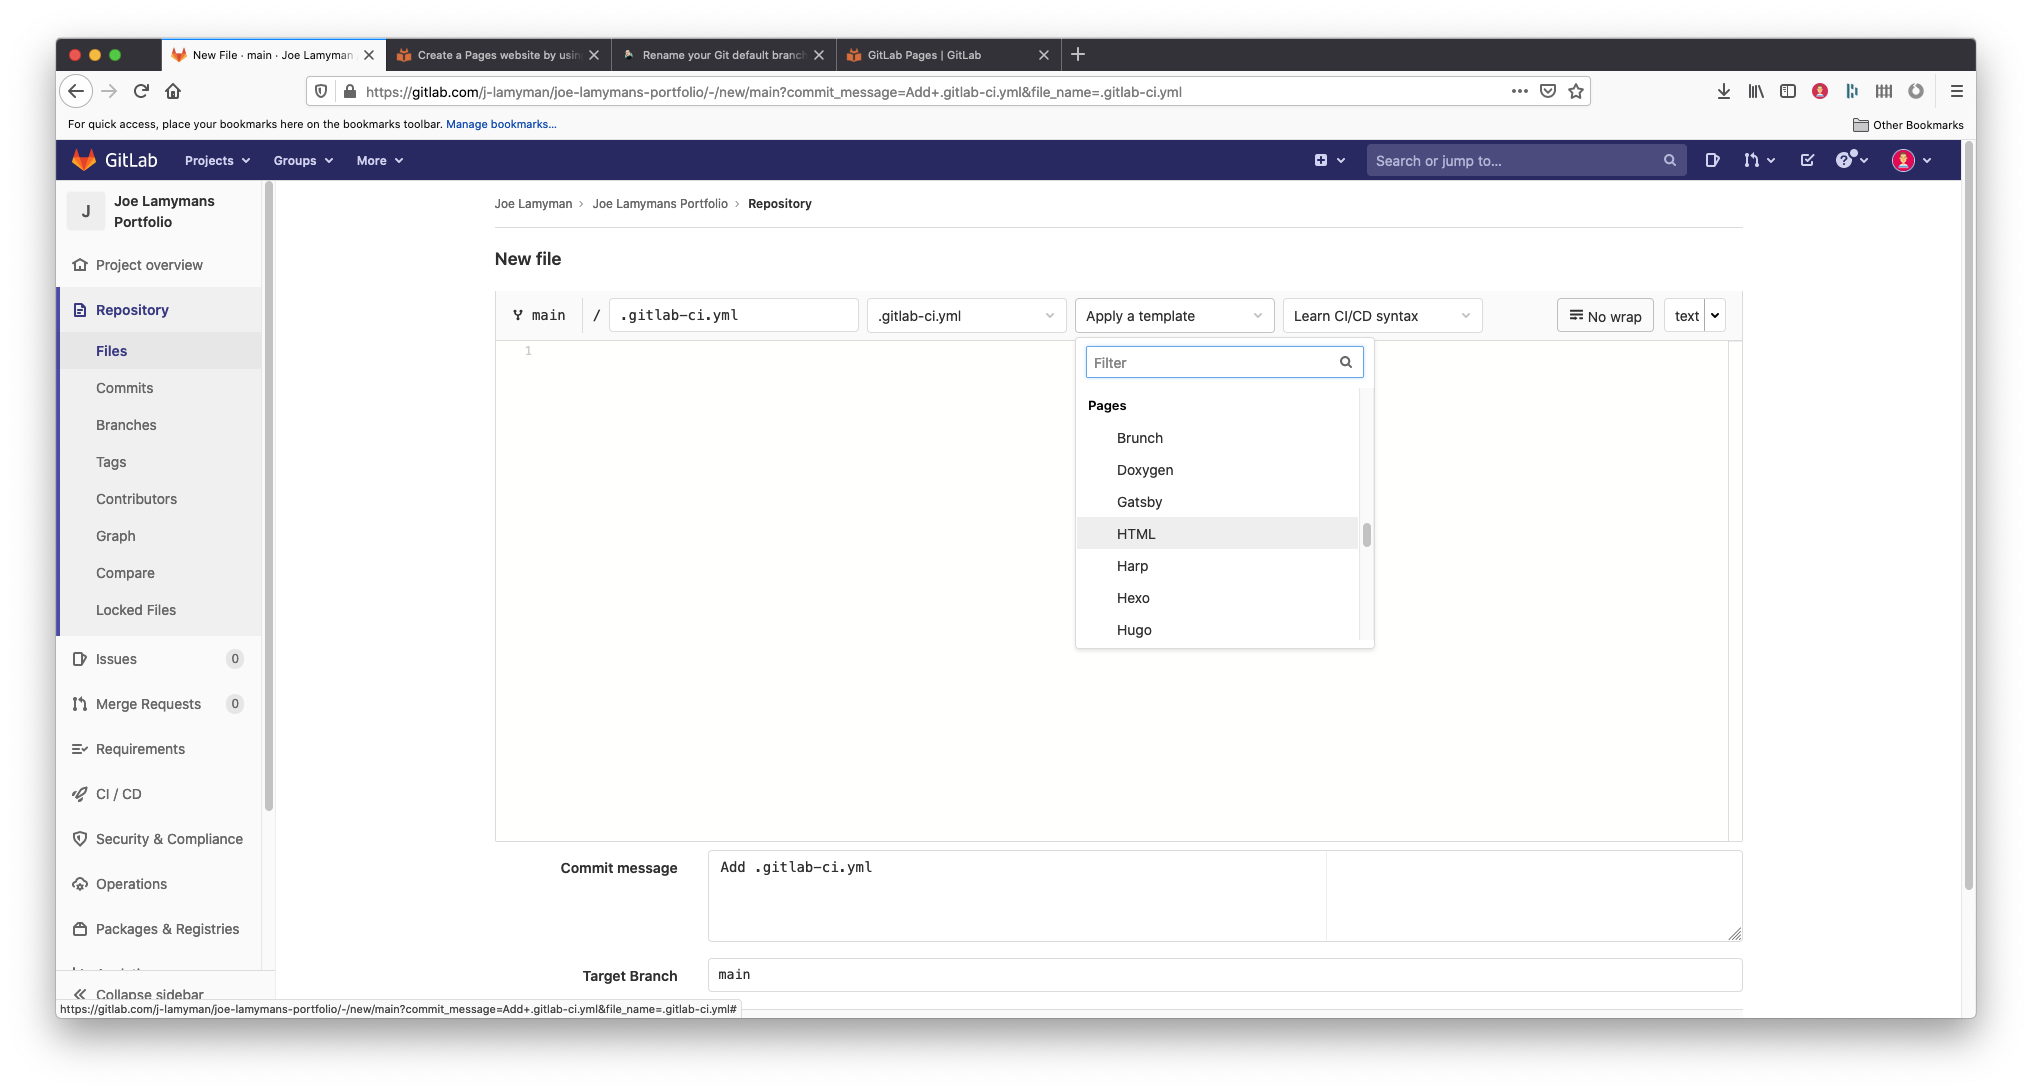
Select the dropdown button titled, 'Apply a template'. Then, you can filter for, or navigate through the dropdown, you are looking for the HTML option under the subheading, 'Pages'.
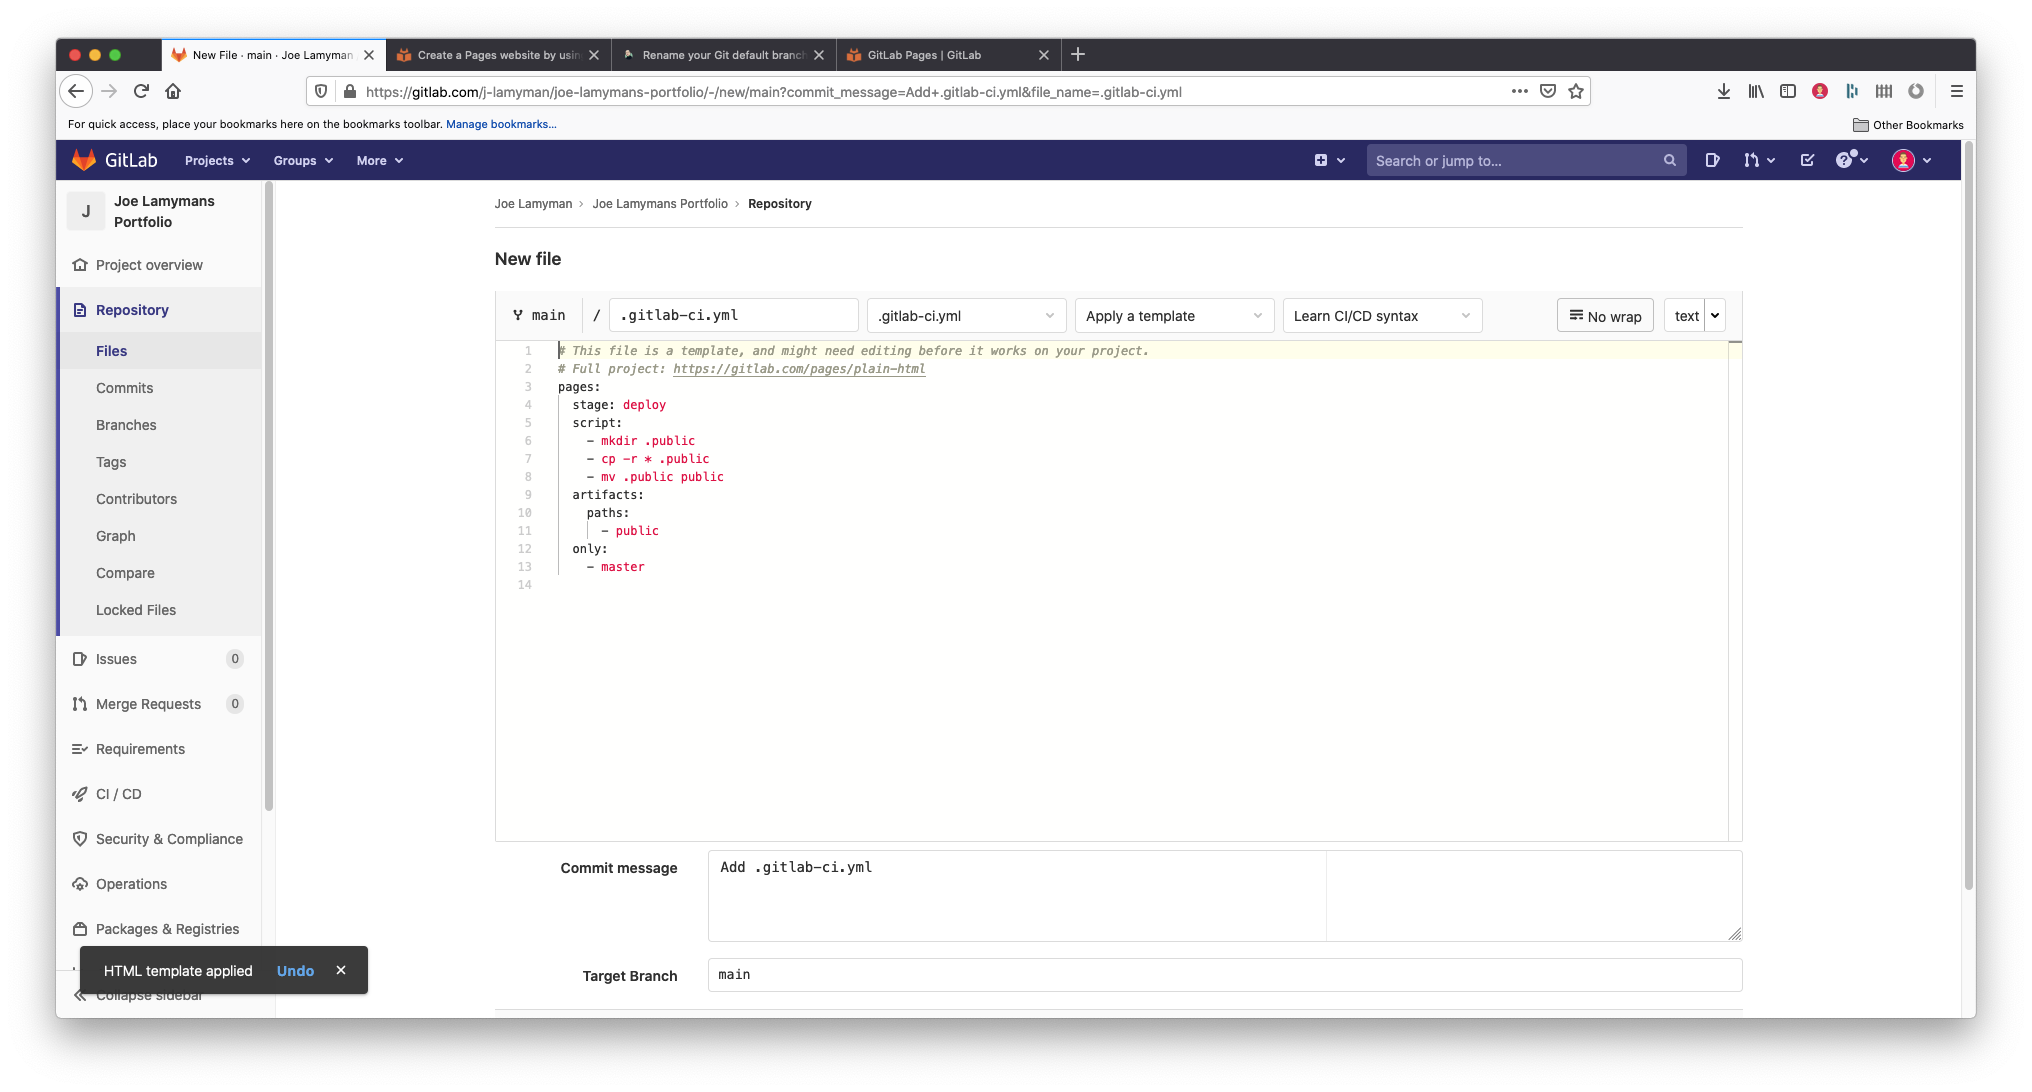
Select this HTML option. As in the screenshot above, a text editor will be automatically filled with YAML config. Ensure that the only: section contains the name of your branch. For example if your branch name is main, ensure that the config under this is main. Ignore everything else on the page and then select the button titled, 'Commit changes'.
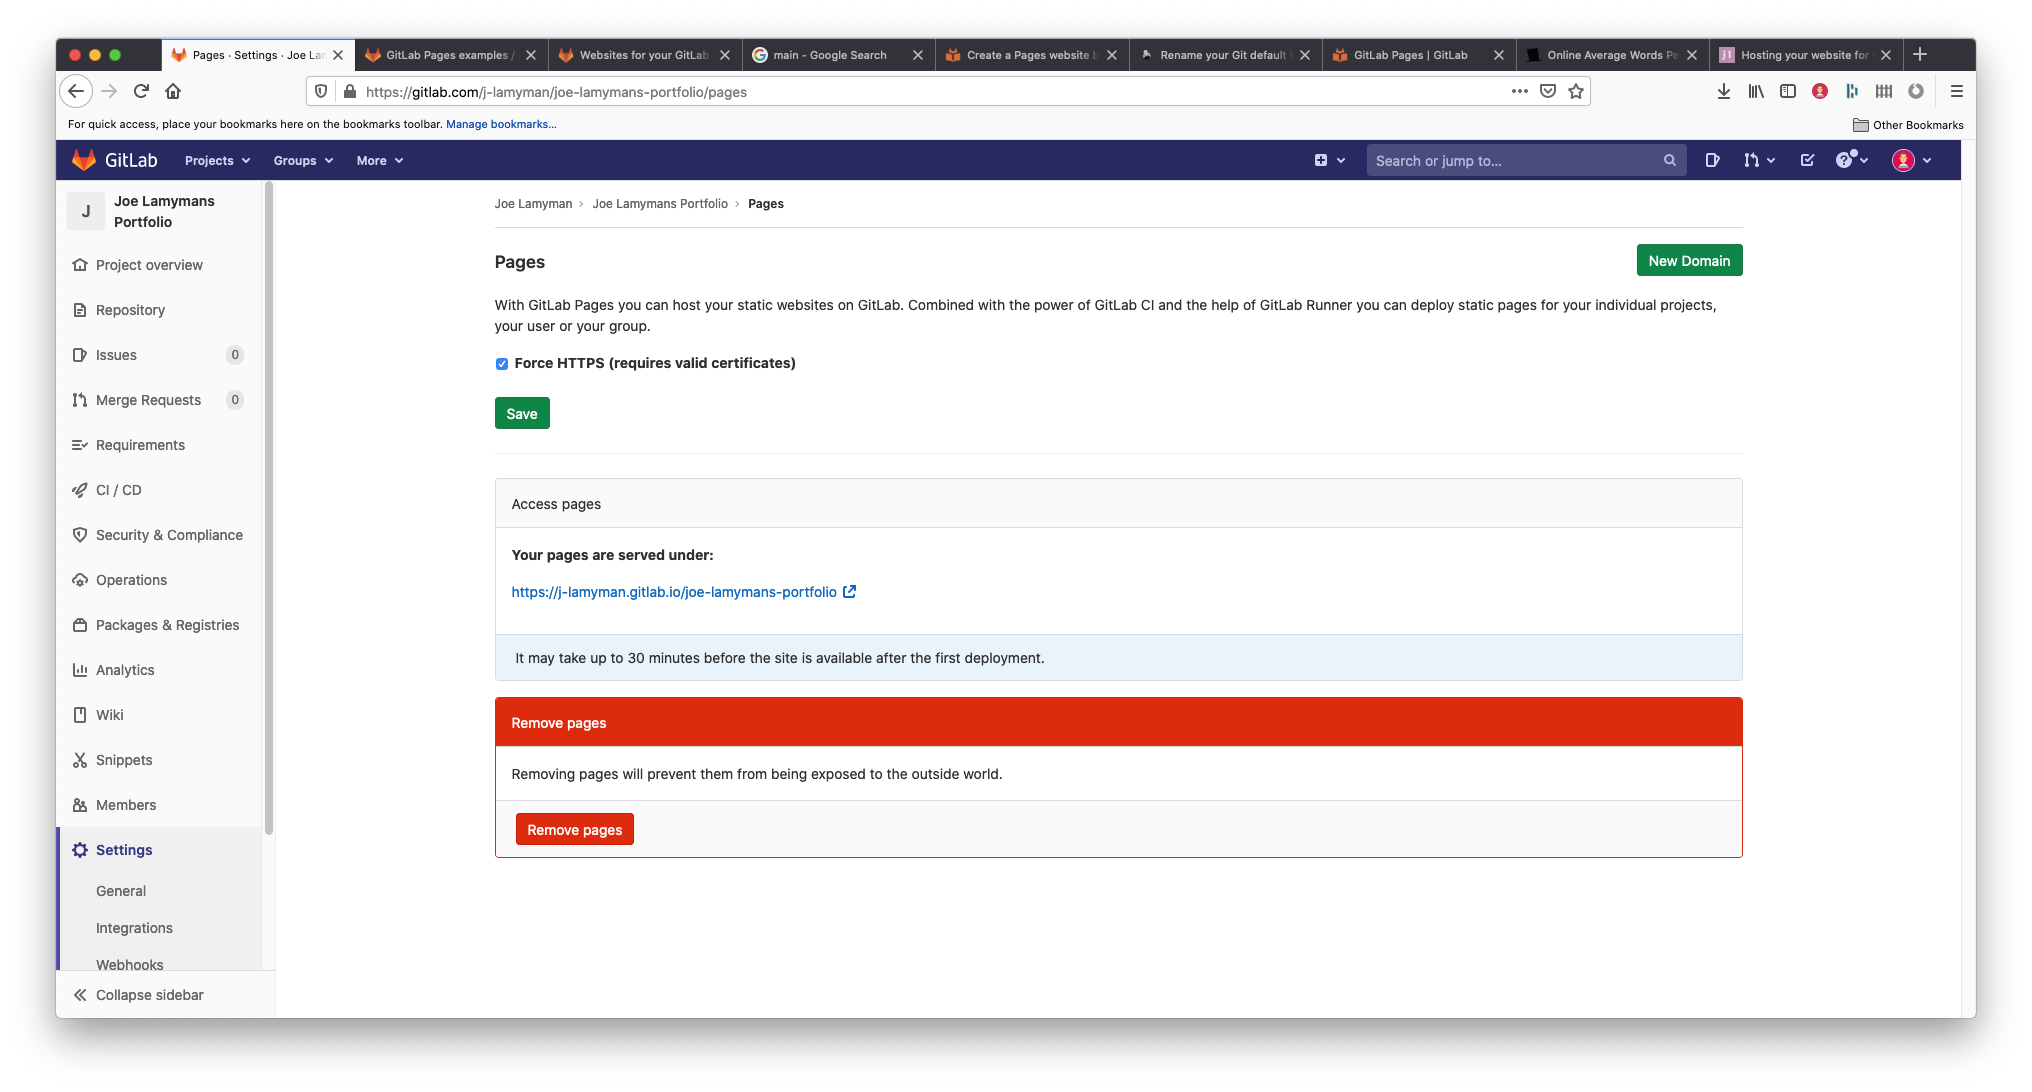
It will take roughly a while for your site to be uploaded, but that is the process. When it's available, you can navigate to 'Settings' and then 'Pages' to find your website's domain. As with Netlify, you can change the existing domain or upload a custom domain.
Wrapping up
I hope that this post helps you to get set up with your own website! Once set up, send me your websites, I would really love to see them.
Additionally, if you have any trouble or find any problems with this guide - just send me a message, I'm happy to help you if you get stuck!